Register a customer
Create a new customer record in four steps, from name and mobile number to identity documents.
Register a person the bank has not seen before. The form has four steps: Identity, Address, Documents and Review.
Before you start
- Search for the customer first. A person who is already on file must not be registered twice.
- Have the customer's People ID card to hand, and any passport or family book they bring.
- If the form shows Not permitted, your role cannot register customers. Ask your supervisor.
Open the form
Open Customers and select New customer at the right of the header. The form opens on step 1.
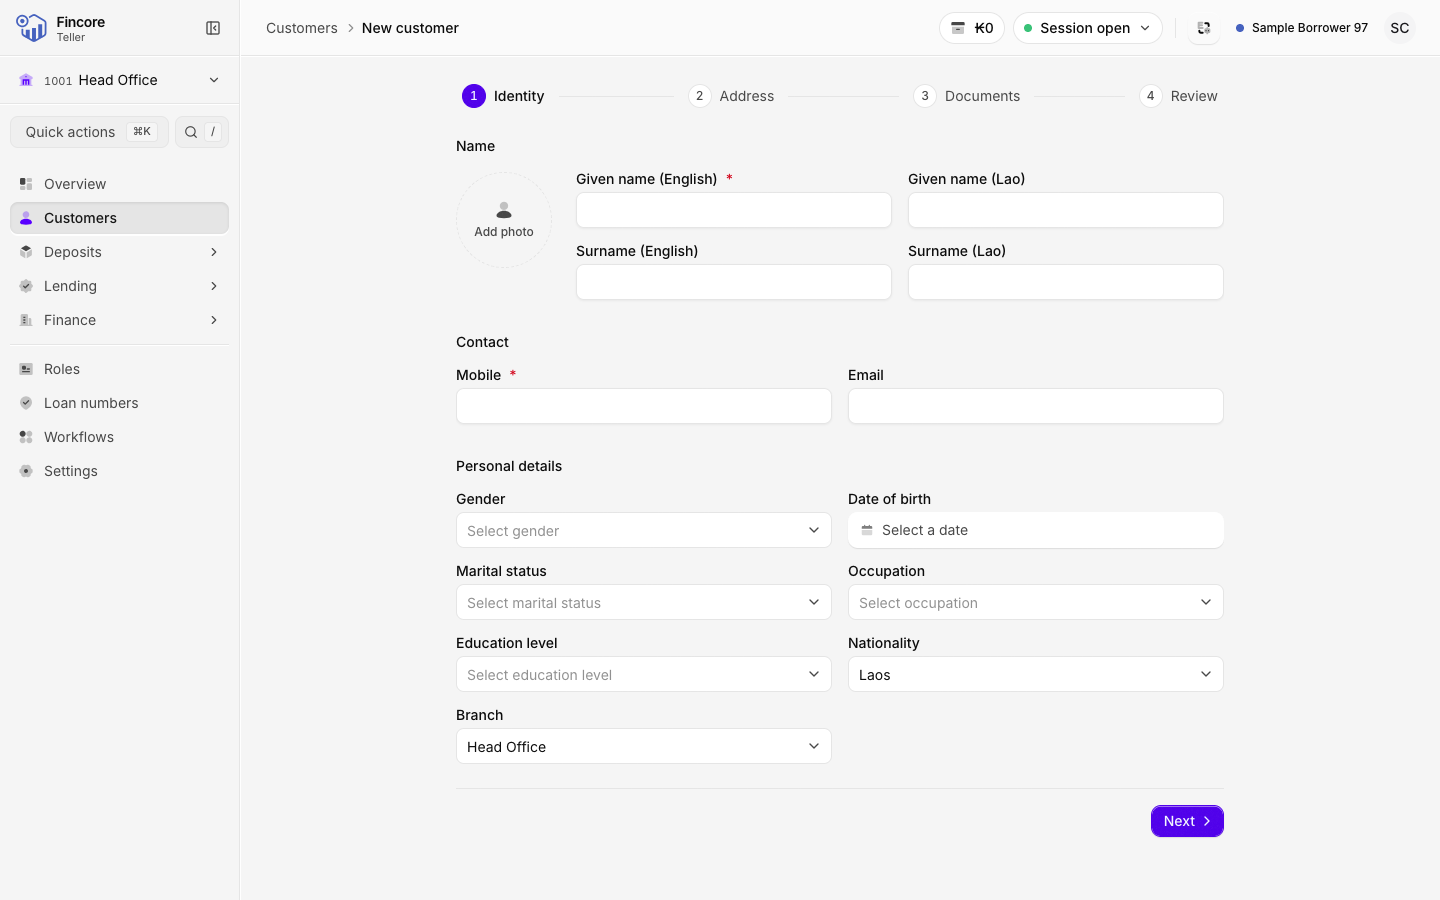
Enter who the customer is
Step 1, Identity, asks for:
- Photo: optional. Select the photo frame beside the names to add one.
- Name: Given name (English), Surname (English), Given name (Lao) and Surname (Lao). Only the English given name is required.
- Contact: Mobile (required) and Email (optional).
- Personal details: Gender, Date of birth, Marital status, Occupation and Nationality.
If the mobile number matches a customer already on file, a Possible existing customer card appears. Select View record to check that record. If it is the same person, stop here and use the existing record. The card is a warning only: it does not stop you going on.
Create the record
Select Next. This creates the customer, with a customer number, before you move to step 2.
From this point the customer exists. If you leave the form now, do not register them again. Find them in the customer list and complete the record with Edit.
Enter the address
Step 2, Address, asks for Province, then District, then Village. All three are required, and each list only offers the places inside the one above it. Street, Street 2 and Postal code are optional.
Select Next to save the address.
Enter the identity documents
Step 3, Documents, always shows the People ID. Its number is required. You can also enter the Name on document, Issue date, Expiry date and attach a scan.
For a Passport, Family book or Other ID, select its add button to open the same fields. Other ID also asks for the ID type.
Select Next. The document details are saved and any scans you attached start uploading.
Check and finish
Step 4, Review, shows the whole record. To correct a part, select Edit beside it to go back to that step. When everything matches the customer's documents, select Create customer.
When the record and every scan are saved, the customer's record opens after a moment. If a scan did not upload, the form stays open so you can retry it, or select Go to customer and add the scan later from the record.
After Create customer, the form can no longer change the record. To correct something, select Edit on profile and edit it on the customer's page.
Good to know
- Next is never greyed out because something is missing. If a step is incomplete, selecting it marks the missing fields in red and moves the cursor to the first one. The button is only unavailable for a moment while a step saves.
- You can go back to an earlier step with Back or the step names at the top. What you typed on the other steps stays there. You can only jump forward to a step you have already reached.
- Each Next saves that step. Going back and selecting it again updates the same customer; it never creates a second one.
- This form only creates customers. To change an existing customer, see Edit customer details.
If something goes wrong
- A message says this step's changes were not saved. The customer already exists. Select the same button again, or finish the record later from the customer's page.
- A message says the record was not confirmed. Check the customer list for the new customer before you try again, so that you do not create a duplicate.
Your bank may differ
Some banks also show Education level and Branch on step 1. These appear only when your bank keeps those lists in the core banking system.