The customer record
Read a customer's details, documents, accounts and loans, and go from the record to the work you need to do.
The customer record is where you confirm who is at the counter and find their accounts and loans. It opens beside the customer list, so you can move from one customer to the next without going back.
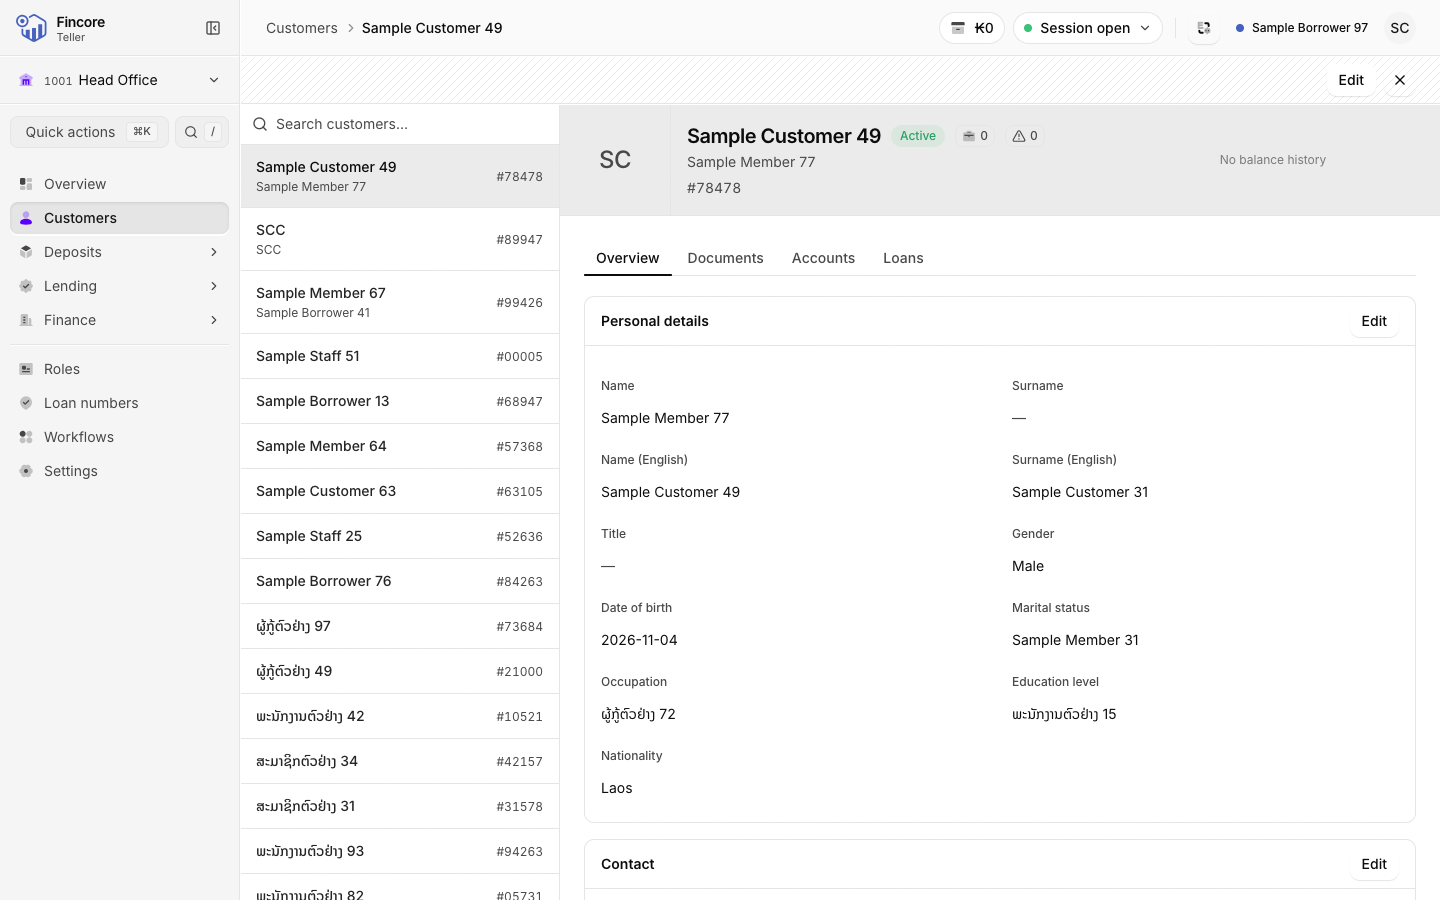
Check the customer's details
The Overview tab shows three sections: Personal details, Contact and Address. Use them to confirm the customer's name, date of birth and mobile number. To change anything, see Edit customer details.
Check identity documents, signature and fingerprint
The Documents tab opens with one line that says whether the customer's identity file can be used today, for example that a document is missing or has expired. Under it is a count of documents and scans on file.
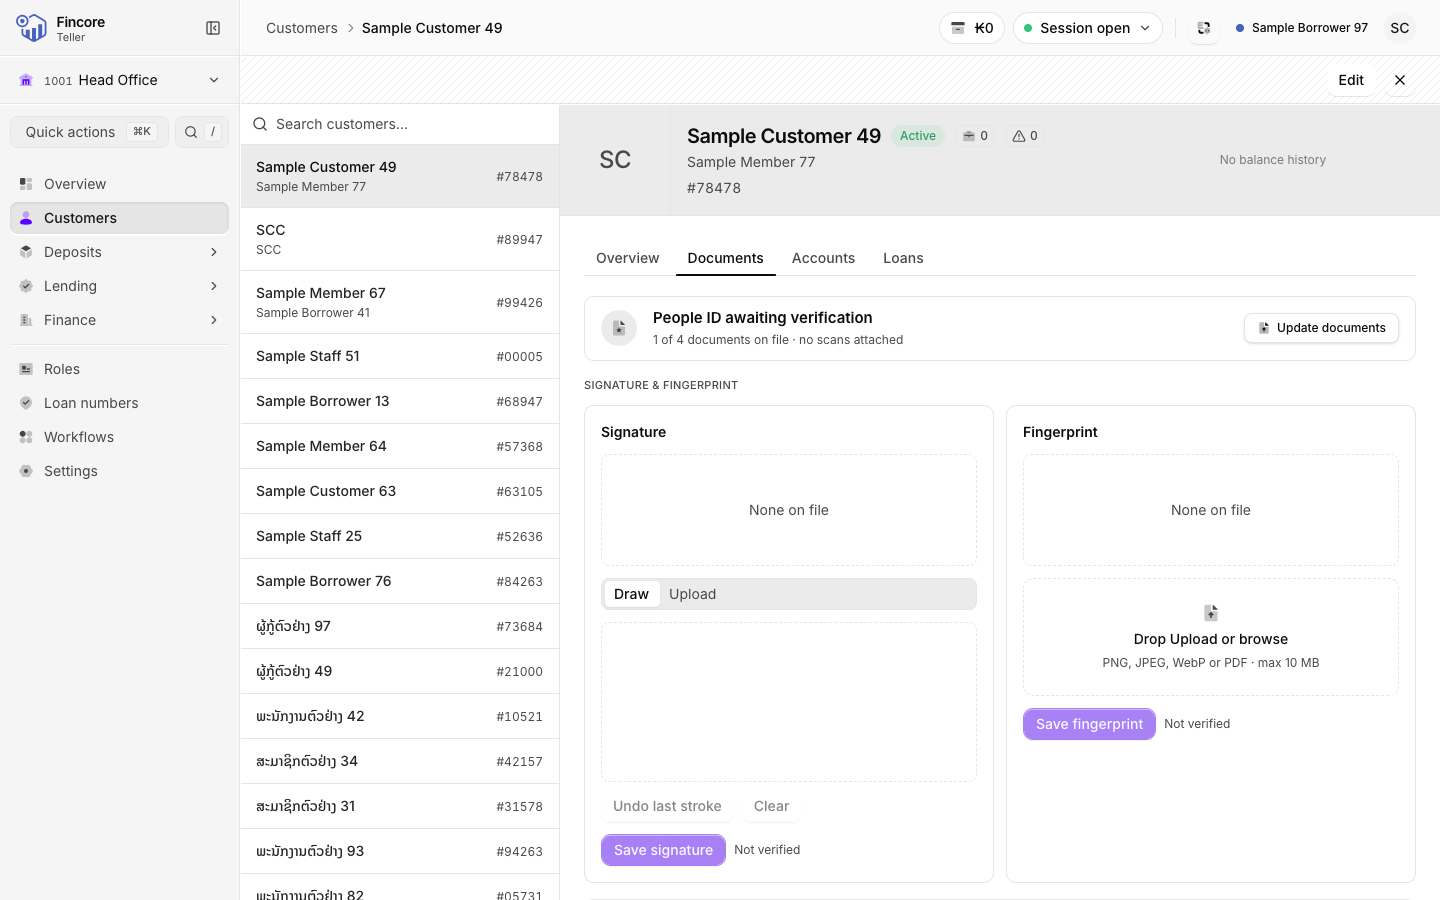
Below that:
- Signature & fingerprint. Each panel shows the scan on file, or None on file. To capture a signature, choose Draw and have the customer sign in the box, or choose Upload and pick an image, then select Save signature. For a fingerprint, upload the image and select Save fingerprint.
- People ID. The customer's main document, marked Primary. Select the row to open it and see the scans, the number and the dates. Select a scan to view it larger.
- Supporting documents. Passport, Family book and Other ID. A document the customer has not given shows Not on file.
Each document shows its state: Verified, Not verified, Expiring, Expired or Not on file.
To add or correct a document, select Edit in the header while you are on this tab. See Update identity documents.
Mark a signature or fingerprint verified
Saving a signature or fingerprint does not mark it verified. Once you have checked the scan against the customer's identity document, select Mark verified. The panel then shows it as Verified, with who verified it and when, if the record holds them.
Mark verified stays on the customer's record for every later visit. It is not a note about today. Use it only after you have compared the signature or fingerprint with the identity document.
Open one of their accounts
The Accounts tab lists the customer's deposit accounts with their Account #, Type and Status. Select a row to open that account.
If the customer has no account yet, the tab shows No deposit accounts and an Open account button. It opens the savings account form, where you choose the customer.
Open one of their loans
The Loans tab lists the customer's loans with their Loan #, Principal, Outstanding and Status. Select a row to open the loan.
If the customer has never borrowed, the tab shows No loans. Select Apply for a loan to start a loan application with this customer already chosen.
The band at the top of the record
The band across the top of the record shows the customer's photo, name, customer number and CID, and whether the record is active. Two small counts show their active loans and their overdue loans. The overdue count turns red when it is above zero. On a wide screen the band also shows the customer's transaction activity over the last 26 weeks.
If the customer has no photo, select Add a photo on the empty frame to upload one. If they have one, select it to see it full size.
To close the record and go back to the full list, select the × at the right of the header.
Look at the account holder from an account
When you are working on a savings, current or fixed deposit account, you can check who owns it without leaving the account.
Select the holder's name
On the account's page, select the customer's name under Holder. A panel slides in from the right with the customer's Personal details, Contact and Address. The account stays on screen behind it.
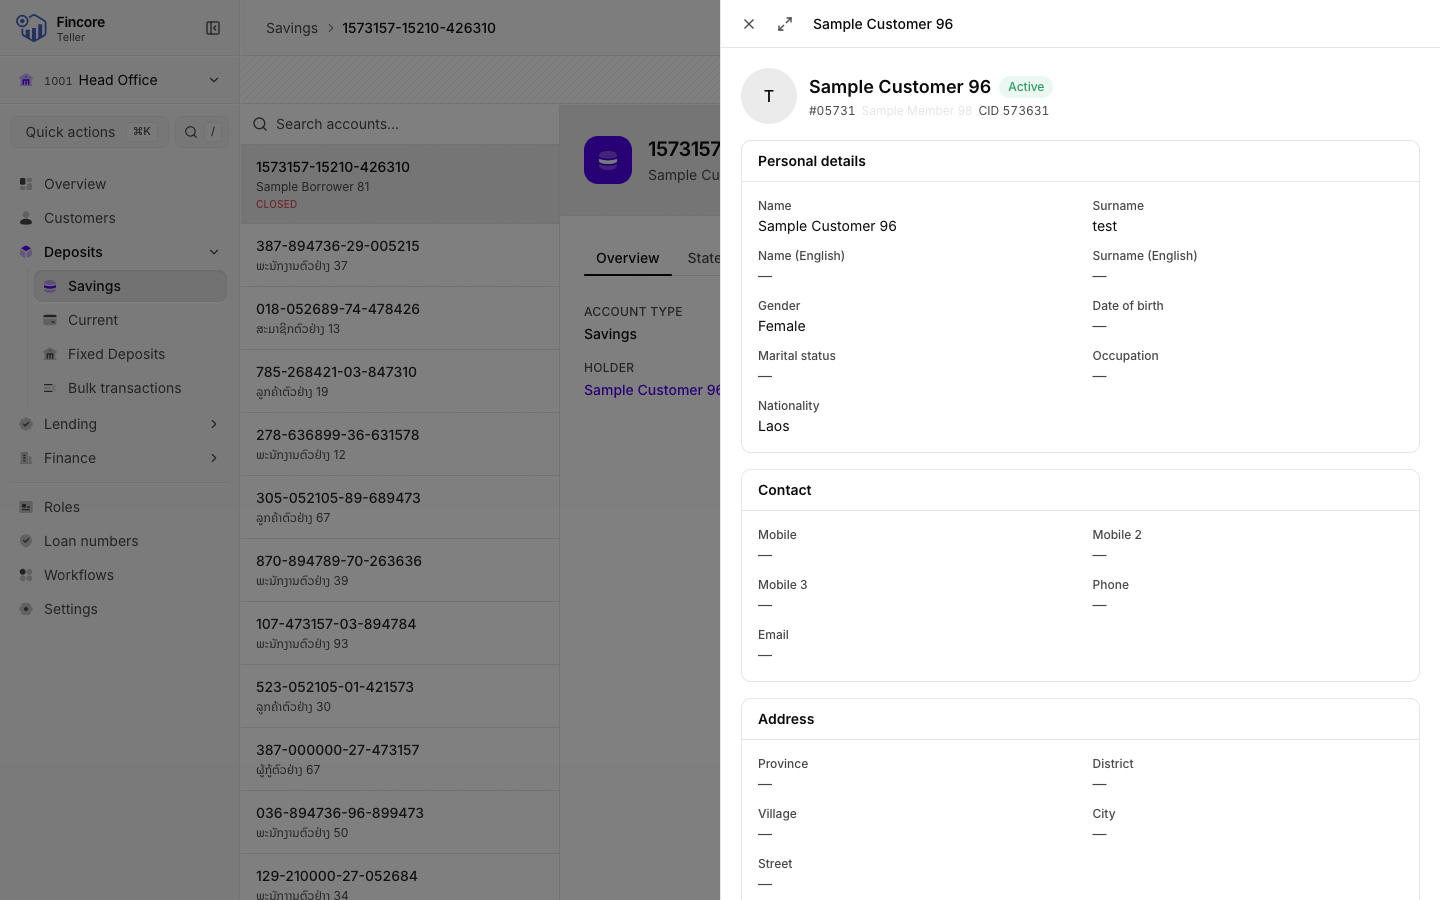
Close it or open the full record
Select the × button (Close) or press Esc to go back to the account, on the same tab you were on. Select the button beside it, Open full record, to go to the full customer record.
Good to know
- Each tab has its own address. Copy the link to send a colleague straight to a customer's Documents or Loans.
- To open the holder's full record in a new browser tab instead of the panel, hold ⌘ (Ctrl on Windows) when you select their name.
- If the Loans tab says the loan history could not be loaded, the core banking system did not answer. The tab never shows an empty list in its place. Reload the page after a moment.
- You only see the buttons your role allows. If Open account or Apply for a loan is missing, ask your supervisor.