Roles
Give a colleague an administration role in the app, change their roles, and reset a branch PIN.
Some screens in the app are run by named people rather than by every teller: workflows, loan numbers, BOL settings, document wording and fixed-asset mappings. A super admin decides who these people are on the Roles screen.
These roles sit on top of the banking roles on your core banking account. They do not let anyone move money, and a super admin does not hold the other roles automatically.
The roles
| Role | What it lets someone do |
|---|---|
| Super admin | Grant and remove roles, reset branch PINs, and change the bank's settings: BOL applicability, the letterhead logo, the fixed-asset posting settings and the loan number format. |
| Admin | Everything a translator can do, and manage the loan number format. |
| Translator | Edit the app's wording and translations on screen, and the Lao captions printed on BOL documents. |
| Workflow admin | Edit and publish teller workflows. |
| Report admin | Edit BOL return mappings, upload the BOL XML file, upload and sign off a trial balance reconciliation, and set the fee and penalty codes of the GL movement report. |
| Asset admin | Manage fixed-asset categories and their account mappings. |
| Teller admin | See every user's journal entries and GL movement, not only their own, and the summary for all tellers on the end-of-day report. |
Before you start
- You need the Super admin role. Without it the screen shows Roles are managed by a super admin.
- You need the colleague's user ID on the core banking system. The Users tab lists it beside each name.
Open Roles
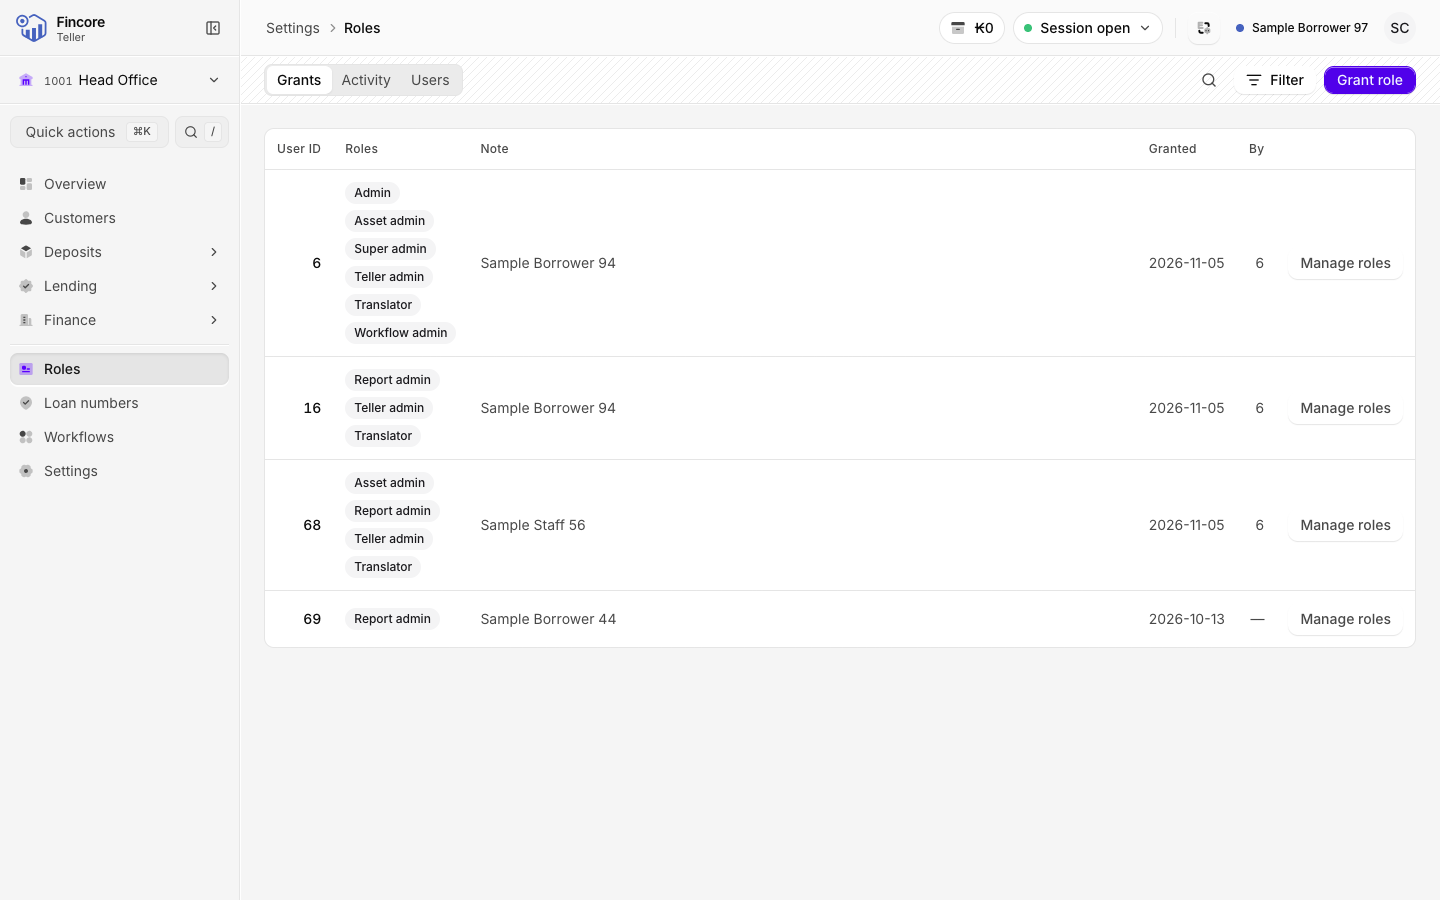
Select Roles in the sidebar. The Grants tab lists everyone who holds a role, with the Note written when it was granted and who granted it.
Use the search to find a user ID or a note, or Filter to show one role.
Grant a role to someone new
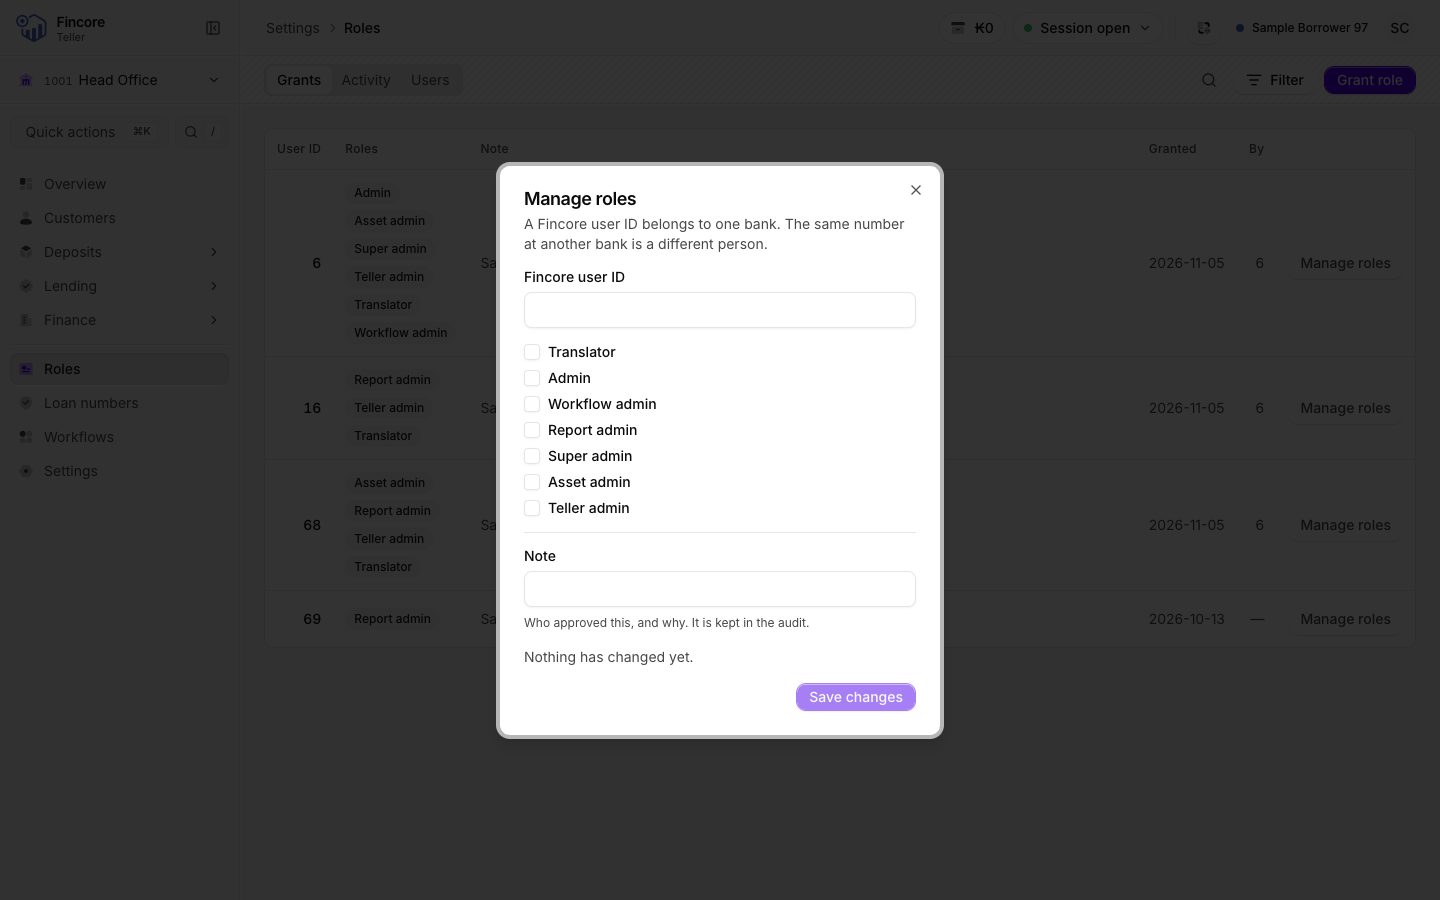
Select Grant role. Enter their Fincore user ID, tick the roles to give them, and write a Note: who approved it and why. The note is kept in the audit and is required.
The line above the button says exactly which roles will be granted or revoked. Read it, then select Save changes.
Change someone's roles
On their row, select Manage roles. Tick or untick roles, write a note, check the line that says what will be granted or revoked, and select Save changes.
Check who changed what
Open the Activity tab. Every grant and revoke is listed with When, Actor and the note.
Reset a branch PIN
When a colleague forgets their branch PIN or is locked out, open the Users tab, find them, and select Reset PIN. Their PIN and any lockout are cleared, and they create a new PIN the next time they switch branch. The reset is recorded against your name.
If something goes wrong
- You cannot untick your own Super admin. This is on purpose. Another super admin must do it.
- The last super admin cannot be removed. Grant the role to someone else first.
- The dialog refuses because the roles changed. Someone else edited this person's roles while you had the dialog open. Close it and open Manage roles on their row again.
- A user ID belongs to one bank. The same number at another bank is a different person.
Your bank may differ
Which banking screens each person sees comes from the roles on their core banking account, which your bank's system administrator manages outside this app. The roles on this page only cover the administration screens listed above.